

Painting with a Fork
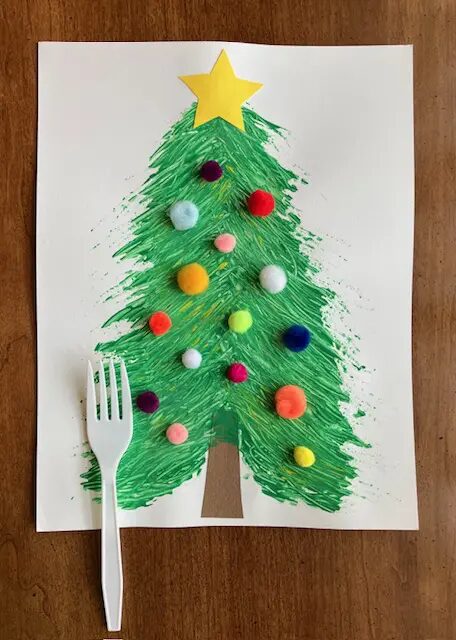
Paint a realistic tree using a plastic fork.
Materials
Heavy plastic shower curtain liner to cover table
Wax paper
Paper plate, coated
Washable craft paint – green, white, and yellow
Plastic fork
White card stock or watercolor paper for the background
Yellow and brown card stock for star and tree trunk
Fifteen ½” or ¼” pom poms; or sequins and beads
Tacky glue
Scissors
1. Cover table with shower curtain liner.
2. Make a sample tree for children to follow.
3. Using star pattern, trace star on yellow paper. Cut one star and set aside.
4. Using tree trunk pattern, trace trunk on brown paper. Cut one trunk and position
it on lower edge of white background paper and glue. Place background paper
on wax paper.
5. Pour green, yellow, and white paint on paper plate.
6. Leave space at top of tree for star. Load back of fork with green paint. To form
tree, drag fork across background paper from center outward, having shorter
branches at top and longer branches at bottom of tree. If needed, fill in white
spaces with green paint.
7. Load small amount of white paint on fork, and add highlights to tree. Repeat
with yellow paint. Dry thoroughly.
8. Position star at the top of tree and glue. Glue pom poms on tree.
*The paper may wrinkle slightly as it dries, giving the tree a dimensional effect.
For Young Children – Cut out the star and tree trunk for the kids. Mark space at top for star. Practice painting with a fork on scrap paper before painting the tree.
For Older Children – Older kids can read and follow the steps above. Practice painting with a fork before painting the tree.
Print